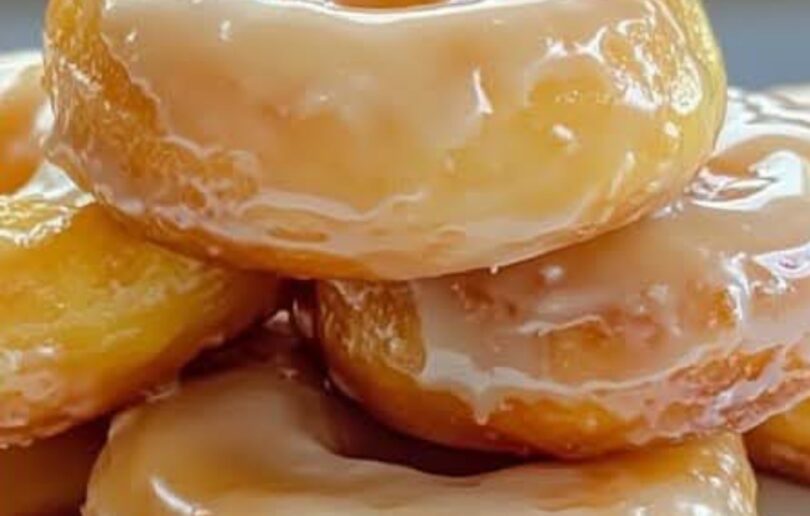
Nothing beats the irresistible aroma and melt-in-your-mouth delight of a freshly made Krispy Kreme donut. While visiting the store is always an option, creating these delectable treats at home is more rewarding and fun. With our comprehensive guide, you’ll learn how to craft these iconic donuts with ease. From the fluffy dough to the perfect glaze, this recipe has everything you need for a truly unforgettable experience.
For the Dough:
3 tablespoons milk
3 tablespoons boiling water
1 teaspoon dry active yeast
8 ounces all-purpose flour (approximately 2 cups, but measuring by weight is recommended)
1 1/2 ounces sugar (about 3 tablespoons)
1 egg
1 ounce butter (cold to room temperature, not melted)
Dash of salt
Oil for frying (enough to fill a wok or deep fryer a few inches deep)
For the Glaze:
1/3 cup butter
2 cups confectioners’ sugar
1 1/2 teaspoons vanilla extract
4 tablespoons hot water (adjust as needed)
Step-by-Step Instructions for Perfect Donuts
1. Prepare the Yeast Mixture
In a large measuring jug, combine milk and boiling water. Add 1 teaspoon of sugar to the mixture, then sprinkle the dry active yeast on top. Stir gently and allow it to sit in a warm spot for about 10 minutes until the mixture becomes foamy.
2. Create the Dough Base
In a large mixing bowl, combine flour, the remaining sugar, and a dash of salt. Add the butter and work it into the dry ingredients using your fingers or a pastry blender until the mixture resembles fine crumbs.
3. Mix and Knead the Dough
Add the foamy yeast mixture and a lightly beaten egg to the dry ingredients. Stir until a soft dough forms. Turn the dough onto a lightly floured surface and knead for 5–10 minutes. The dough should feel smooth, springy, and slightly sticky, with small bubbles forming under the surface.
4. First Rise
Place the kneaded dough in a lightly greased bowl, cover it with plastic wrap or a clean kitchen towel, and let it rise for about 1 hour, or until it doubles in size.
Shaping the Donuts
5. Shape the Donut Holes
After the dough has risen, transfer it to a lightly floured surface. Divide it into four equal pieces. Roll each piece into a long rope, about 1–1.5 inches in diameter. Cut the rope into 1-inch segments, then roll each segment into a small ball to create donut holes.
6. Second Rise
Place the donut holes on a baking tray lined with parchment paper or a lightly greased wire rack. Cover them with a kitchen towel and let them rise again for 30 minutes until they puff up.
Frying the Donuts
7. Heat the Oil
Fill a wok or deep fryer with enough oil to submerge the donuts. Heat the oil to 375°F (190°C). Use a thermometer to maintain a consistent temperature.
8. Fry the Donuts
Carefully lower a few donut holes into the hot oil, ensuring not to overcrowd the pan. Fry for about 2 minutes per side, or until golden brown. Use a slotted spoon to remove the donuts and place them on a paper towel-lined plate to drain excess oil.
Making the Signature Glaze
9. Prepare the Glaze
In a medium bowl, melt butter and mix in confectioners’ sugar and vanilla extract. Gradually add hot water, one tablespoon at a time, until the glaze reaches a smooth and pourable consistency.
Final Touch: Glazing the Donuts
10. Glaze While Warm
Dip each warm donut hole into the glaze, ensuring full coverage. Allow the excess glaze to drip off before placing the donuts on a wire rack to set. For extra sweetness, dip the donuts a second time.
Tips for Success
Use a Kitchen Scale: Measuring flour by weight ensures consistency and avoids overly dense donuts.
Control the Oil Temperature: Consistently monitor the oil temperature to prevent undercooking or burning.
Glaze Warm Donuts: Applying the glaze while the donuts are warm ensures optimal absorption and a glossy finish.
Enjoy Your Homemade Krispy Kreme Donuts
Congratulations! You’ve just mastered the art of making homemade Krispy Kreme donuts. These delightful treats are perfect for breakfast, desserts, or as a sweet indulgence any time of day. Serve them fresh for the best experience.


